I’ve helped hundreds of people build their first garage shed without hiring a contractor.
You’re probably looking at your backyard right now wondering if you can actually pull this off. The plans look complicated. The material lists are confusing. And one wrong cut could cost you hundreds of dollars.
Here’s the thing: building a garage shed isn’t as hard as it looks once you break it down into simple steps.
I created this guide because I was tired of seeing people overpay for prefab sheds or give up halfway through a project. You don’t need years of carpentry experience. You just need a clear plan and the right approach.
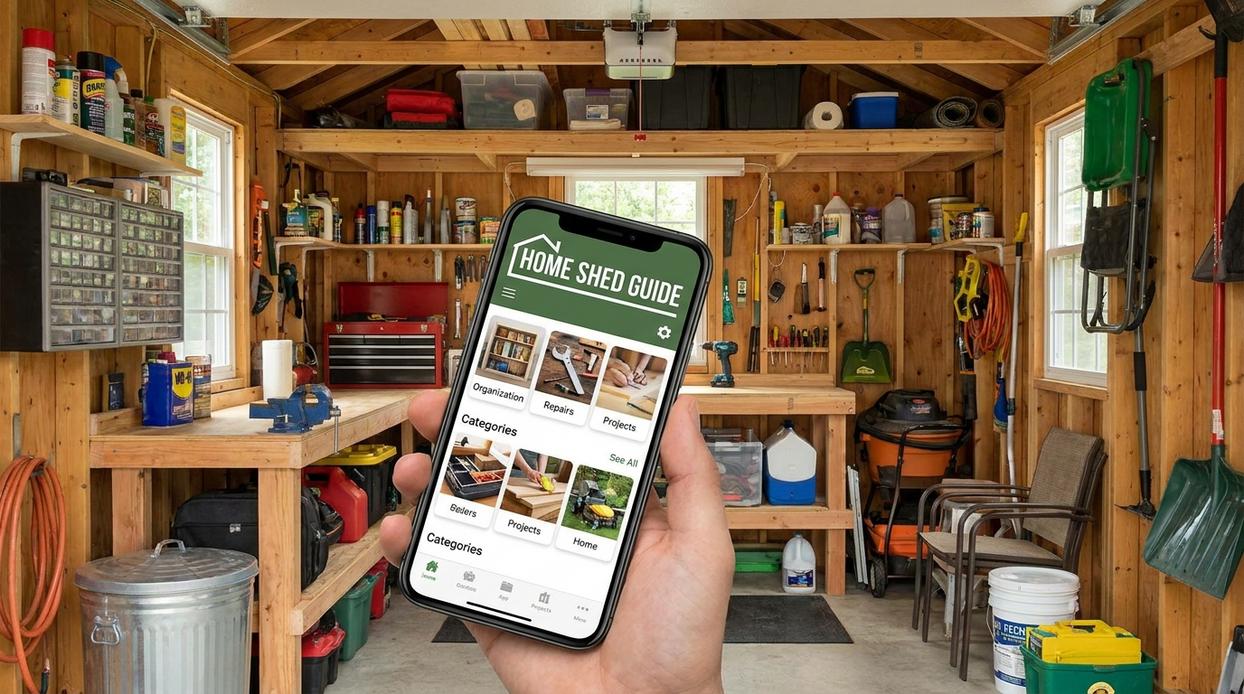
This garage shed guide appchousehold walks you through every stage of construction. From pouring the foundation to installing the roof. I’ve included a mobile app that keeps everything organized so you’re not constantly flipping through pages or second-guessing your measurements.
You’ll learn exactly what materials to buy, which tools you actually need (not the ones you think you need), and how to avoid the mistakes that trip up most first-time builders.
No confusing jargon. No skipped steps. Just a straightforward process that gets you from empty lot to finished shed.
By the end, you’ll have a durable structure that adds real value to your property. And you’ll save thousands compared to hiring it out.
Step 1: Planning and Design – The Digital Blueprint
You can’t just start hammering boards together and hope it works out.
I learned that the hard way on my first shed project. Ended up with a structure that violated setback rules and had to tear half of it down.
Here’s what I should have done first.
Defining Your Needs
Start by asking yourself what you’re actually storing. Lawn mowers and hand tools need different space than a riding mower and full workshop setup.
Write it down. Measure your biggest items. Add two feet to your calculations because you WILL accumulate more stuff. (We all do.)
This determines your shed size and whether you need single or double doors.
Navigating Permits and Zoning
Some people say permits are optional for small sheds. That you can skip the hassle and just build.
They’re wrong.
Your local building department can make you tear down an unpermitted structure. Plus, it’ll haunt you when you try to sell your house.
Check your property line setbacks first. Most areas require at least 3 feet from the property line, but yours might be different.
The garage shed guide appchousehold includes a permit checklist that walks you through exactly what you need. It saves you from making multiple trips to the building department.
Choosing Your Design
You’ve got three main styles to pick from.
Gable roofs are the classic choice. They shed water well and give you headroom.
Gambrel roofs (think barn style) maximize vertical storage space. Great if you need to hang things or add a loft.
Lean-to designs work when you’re building against an existing structure.
Use the app’s 3D visualizer to see how each style looks in your actual backyard. The augmented reality feature lets you walk around it before you commit.
Generating a Smart Materials List
Once you finalize your design, the app creates your shopping list automatically.
It breaks everything down by category. Lumber, fasteners, roofing, siding. Even tells you quantities so you’re not guessing at the hardware store.
No more buying too much or making three trips because you forgot something.
Step 2: Laying the Foundation – The Base of a Great Shed
Most shed guides will tell you that a concrete slab is the gold standard.
That you NEED a perfect concrete foundation or your shed will fall apart in five years.
I’m going to tell you something different.
A concrete slab is overkill for most backyard sheds. There, I said it.
Look, I know contractors love concrete. It’s what they know. It’s what they’ve always done. But for a typical 10×12 storage shed? You’re probably wasting money and time.
Here’s what actually matters: a level base with good drainage.
Site Preparation Comes First
Before you think about concrete or gravel, you need a clear and level area. I mean actually level, not eyeball level.
Excavate the site about 4 inches deep. Remove grass, roots, everything. Then grade it so water flows AWAY from where your shed will sit.
Poor drainage will destroy any foundation. Concrete or not.
Your Two Real Options
You’ve got a concrete slab or a gravel pad with skid foundation. That’s it for most DIY builds.
The concrete slab looks professional. It lasts forever. But you’re looking at serious work (and serious back pain if you’ve never poured before).
A skid foundation using pressure-treated lumber? Way simpler. Way faster. And honestly, just as good for sheds under 200 square feet.
If You Go With Concrete
Form it up with 2×6 boards. Make sure it’s square by measuring diagonals.
Mix your concrete according to the bag instructions. The garage shed guide appchousehold has a built-in calculator that tells you exactly how many bags you need. No guessing.
Pour in sections. Work fast because concrete doesn’t wait for anyone.
Finish it smooth with a trowel. Let it cure for at least three days before building on it.
The Skid Foundation Alternative
This is what I actually recommend for most people.
Lay down landscape fabric. Add 4 inches of compacted gravel. Then build a frame using 4×6 pressure-treated skids.
Check for square by measuring corner to corner. Both measurements should match exactly.
Level it with shims or more gravel underneath. A skid foundation flexes slightly with ground movement instead of cracking like concrete does.
Plus you can build it in an afternoon instead of waiting days for concrete to cure.
Step 3: Framing the Structure – From Floor to Roof
This is where your shed starts looking like an actual building.
Up until now, you’ve been working with concrete and posts. But framing? That’s when things get real.
Some builders will tell you to hire a pro for this part. They say framing is too technical for beginners and you’ll mess it up if you try it yourself.
I disagree.
Sure, framing takes precision. But it’s not rocket science. With the right guidance and a few basic tools, you can absolutely do this yourself.
Let me walk you through it.
Building Your Floor Frame
Start with the floor joist system. This sits on top of your foundation and supports everything above it.
You’ll lay out your rim joists first (the outer frame). Then add floor joists every 16 inches on center. That spacing matters because it keeps your floor solid without using more lumber than you need.
Check for square as you go. Measure diagonally from corner to corner. If both measurements match, you’re square. If they don’t, adjust before you secure anything permanently.
Once it’s square, attach joist hangers and lock everything down.
Framing and Raising Your Walls
Here’s what most people get wrong. They try to build walls vertically.
Don’t do that.
Frame each wall section flat on your floor deck. Lay out your bottom plate and top plate. Mark your stud locations every 16 inches. Cut your studs to length (usually 92 5/8 inches for an 8-foot wall after accounting for plates).
Nail it all together while it’s lying flat. Way easier.
Then comes the fun part. Lift the wall into place. If you’re working alone, prop it up temporarily. If you’ve got help, even better.
Secure the bottom plate to your floor frame. Brace the wall plumb (perfectly vertical) and move to the next section.
The home building guide appchousehold app shows you exactly how this looks in 3D. You can rotate the model, zoom in on connections, and see where every nail goes. No guessing.
Using Interactive 3D Instructions
This is where our app really shines.
You’re not staring at flat diagrams trying to figure out what goes where. You’re looking at a 3D model that matches exactly what you’re building.
Need to see how the corner studs connect? Tap and rotate. Wondering about header placement over a door opening? The model shows you the exact lumber sizes and positioning.
It’s like having a master carpenter standing next to you, except you can rewind and replay as many times as you need.
Setting Your Roof Trusses
Most people dread this step. And yeah, it’s the trickiest part of framing.
But here’s the thing. If you’ve got your walls plumb and your measurements right, roof trusses are just a matter of careful placement.
You can buy pre-built trusses (easier) or build them yourself (cheaper). Either way, you’ll need help lifting them into position.
Start at one end. Set the first truss. Brace it temporarily. Then work your way across, spacing each truss 24 inches on center.
Once all your trusses are up, add your roof sheathing. OSB or plywood works fine. Start at the bottom edge and work your way up, staggering the seams as you go.
Pro tip: Don’t skip the hurricane clips or truss ties. They’re small metal connectors that keep your roof attached during high winds. Takes five minutes per truss and could save your entire structure.
The garage shed guide appchousehold walks through roof framing with step-by-step visuals. You’ll see exactly how each truss connects to the top plate and how sheathing overlaps.
By the time you finish this step, you’ll have four walls and a roof. It’ll actually look like a building.
And that feeling? Worth every bit of effort.
Step 4: Finishing Touches – Weatherproofing and Access
You’ve got your frame up and your walls squared.
Now comes the part that separates a shed that lasts from one that falls apart in three years.
Most people think finishing is just about making things look nice. But really, it’s about keeping water out and making sure your shed actually works when you need it.
I’m talking about siding, roofing, and getting your doors and windows in right. Miss any of these steps and you’ll be dealing with leaks, rot, and doors that won’t close come winter.
Let me walk you through each one.
Installing Siding and Trim
First thing you need to decide is what siding makes sense for where you live.
T1-11 is cheap and goes up fast. It’s plywood with grooves cut in, and if you prime and paint it properly, it holds up fine in most climates.
Vinyl costs more but you never have to paint it. Good choice if you’re in a wet area or just don’t want the maintenance.
Lap siding (the horizontal boards) gives you that classic look. Takes longer to install but it’s worth it if appearance matters to you.
Whatever you pick, the garage shed guide appchousehold in the app shows you exactly how to install it. The video tutorials cover everything from starting your first row to cutting around windows.
Just remember to work from the bottom up and check your level every few rows.
Roofing Your Shed
Here’s where you really can’t mess around.
A bad roof means everything inside gets ruined. Your tools rust. Your wood warps. The whole structure starts to rot from the inside out.
Start with tar paper. It’s your first line of defense against water. Overlap each row by at least two inches and staple it down so it doesn’t blow off while you’re working.
Then come the shingles. Asphalt shingles are what most people use because they’re affordable and they work. Start at the bottom edge and work your way up, making sure each row overlaps the one below it.
The app breaks this down step by step. You’ll see exactly how to align your shingles and where to place your nails.
(Pro tip: Don’t roof in extreme heat. The shingles get soft and you’ll end up with footprints all over your roof.)
Adding Doors and Windows
This is where I see people cut corners and regret it later.
You need to frame your rough openings correctly. Too small and your pre-hung door won’t fit. Too big and you’ll have gaps that let in air and water.
Measure twice. Actually, measure three times.
When you install your door, make sure it’s plumb and level before you secure it. Use shims to get it perfect. A door that’s even slightly off will stick in summer and leave gaps in winter.
Windows work the same way. The building checks appchousehold feature helps you verify everything is square before you commit.
Seal around both with proper flashing and caulk. That’s what keeps the weather out.
Take your time on this step. A well-installed door and window make your shed feel like a real building instead of just a box in your backyard.
Your New Shed, Built with Confidence
You came here wondering how to build a garage shed without making expensive mistakes.
Now you have the complete roadmap. From foundation to roof, you know exactly what to do.
Building a shed can feel overwhelming when you’re staring at an empty yard. But this garage shed guide appchousehold breaks it down into steps you can actually follow.
You’ve learned how to plan your layout, choose the right materials, and avoid the pitfalls that trip up most first-time builders. That’s the difference between a weekend project that drags on for months and one you finish right.
The digital tools make it even easier. You can see your shed before you cut a single board.
Here’s what to do next: Download the companion app and start designing your shed. Input your measurements, play with different layouts, and get a clear picture of what you’re building.
The app walks you through each phase. You’ll have your materials list, cut diagrams, and step-by-step instructions right on your phone.
Your shed is waiting. Time to turn this plan into something real.
 Jacek Gorsasz